This guide explains how to install a threaded flange. A correct installation prevents leaks and ensures safety. We will cover the steps, tools, and mistakes to avoid.
This information is based on industry standards. It is designed for engineers, technicians, and project managers.
What You Need Before Starting
Gather these tools and materials. Having everything ready makes the job easier.
- Threaded Flange: Inspect it for damage. Check that the threads are clean.
- Pipe: The pipe threads must be clean and undamaged.
- Pipe Sealant: Use Teflon tape or a liquid thread compound.
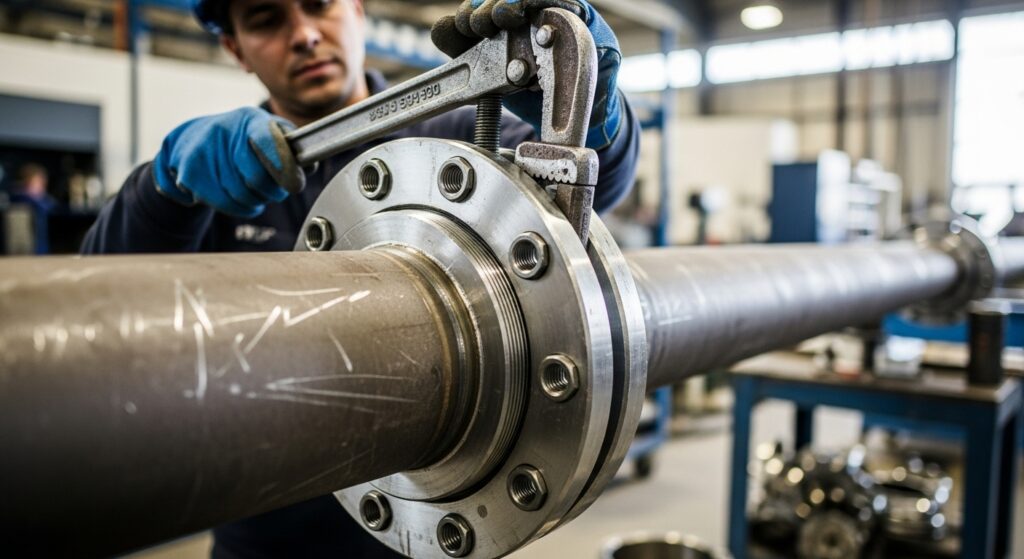
- Wrenches: You need a strap wrench or a standard wrench. A pipe wrench can damage the flange.
- Wire Brush: For cleaning the pipe threads.
- Gasket: The correct type and size for your flange.
- Bolts and Nuts: The right size and material for your flange class.
- Safety Gear: Wear gloves and safety glasses.
Step-by-Step Installation Guide
Follow these steps in order.
Step 1: Inspect and Clean the Threads
First, check the flange and pipe threads. Look for cracks, dents, or rust. Use a wire brush to clean the male pipe threads. Remove all dirt and old sealant. Wipe the threads with a clean rag. Clean threads make a better seal.
Step 2: Apply the Sealant
Sealant lubricates the threads and prevents leaks.
- Teflon Tape: Wrap the tape clockwise around the pipe threads. Start at the second thread. Do 3 to 4 wraps. Do not cover the first thread. This helps the flange start straight.
- Thread Compound: Apply a even layer over all the pipe threads. Do not use too much.
Step 3: Hand-Tighten the Flange
Screw the threaded pipe flange onto the pipe by hand. It should turn smoothly. If it gets stuck, you may have cross-threaded it. Stop and unscrew it. Start again. Cross-threading damages the threads.
Step 4: Wrench Tighten the Flange
Use a wrench to tighten the flange. Turn it until it is hand-tight, then give it two more full turns. This is a common rule. The goal is to have the flange faces aligned for bolting. Do not overtighten. Overtightening can crack the flange or strip the threads.
Step 5: Align and Bolt the Flanges
Place the gasket between the two flange faces. Insert the bolts and hand-tighten the nuts. Tighten the bolts in a criss-cross pattern. This squeezes the gasket evenly. Do not tighten one side completely before the others. Follow torque specifications if you have them.
Common Mistakes to Avoid
People often make these errors.
- Overtightening: This is the most common mistake. It breaks the flange or ruins the threads. The seal comes from the sealant, not extreme force.
- Wrong Sealant: Do not use hard-setting pipe dope. It can make the flange impossible to remove later.
- Dirty Threads: Installing a flange on dirty threads will cause a leak.
- Damaging the Flange: Using a pipe wrench on the flange body can damage it. Use a strap wrench instead.
- Ignoring Alignment: Do not use the bolts to pull misaligned flanges together. This puts stress on the system.
When to Use Threaded Flanges
Threaded flanges are good for some jobs, but not all.
Good for:
- Low-pressure systems.
- Places where welding is not safe or practical.
- Systems that need occasional disassembly.
- Small pipe sizes (usually 4 inches and below).
Not good for:
- High-vibration services. The threads can loosen.
- High-pressure or high-temperature systems.
- Systems with frequent temperature changes.
For critical applications, a welded flange is often a better choice. You can learn more about flange types and specifications at Texas Flange.
Frequently Asked Questions
How much Teflon tape should I use?
Use 3 to 4 wraps. The threads should still be visible through the tape. Too much tape can prevent a tight seal.
Can I reuse a threaded flange?
You can, but you must inspect it carefully. Look for thread damage or cracks. You must clean off all the old sealant completely.
What is the torque for a threaded flange?
There is no single number. It depends on the flange size and material. The “hand-tight plus two turns” method is a reliable field practice. For specific values, check engineering documents.
Why is my threaded flange leaking?
It is usually one of these reasons: dirty threads, not enough sealant, under-tightening, or cross-threading. Vibration can also loosen the connection over time.
Is tape or compound better?
Both work well. Tape is clean and simple. Compound can be better for irregular threads and helps prevent galling on stainless steel.
What if the flanges won’t align?
Do not force them with the bolts. Unscrew the flange slightly to achieve alignment. If it still won’t align, the pipe may need to be cut and re-threaded.
Summary
Installing a threaded flange is a straightforward job. The key steps are clean threads, correct sealant, and proper tightening. Avoid the common mistake of over-tightening.
Using the right procedure ensures a safe and leak-free connection. For more technical data on threaded flanges dimensions and pressure ratings, consult resources like Texas Flange.
If you have questions about your specific application, contact a qualified engineer.